Tuesday, December 21, 2010

Rear Seat Fiberglass and Front Seat Box Doublers


Today, I fiberglassed the rear seat vertical on the front side and applied a second epoxy layer after waiting about 5 hours. I also cut to size and epoxied on the doublers on the front seat boxes where I will cut the access hole.
4 hours

Monday, December 20, 2010

Rear Seat Started


Tonight, I cut out the vertical part of the rear seat, and cut 1 1/2" vent holes in it as well as angled the sides to match the sides of the boat and the area around the quarter rounds.
I also took out the screws on the seat boxes so they would not set and be impossible to get out later when the epoxy fully cures.
Today 8 hours

Front Seat Boxes Epoxied Together


Today, the front seat boxes were epoxied together after sanding all the edges smooth. I also marked on the front of the seat boxes where I am going to cut a hole to allow access to this area after it is put on. The hole is 6" x 12". I may move it inboard a little bit to allow for the pilot house sides. I will also double up this front piece with another 1/2" piece of plywood to strengthen it.

Thursday, December 16, 2010

Stem Quarter Rounds and Seat Box


The last couple of days I cut to length and epoxied on the quarter rounds to each side of the stem where the sides will attach.
I also began building the seat boxes. I haven't decided the best way to finish them as I would like for the area to be accessible for storage. I may cut a hole in the front and double up the plywood there for strength.

Wednesday, December 8, 2010

Fence Installed On Bottom


Today and tonight I installed the fence. I first cut it to size and to match the quarter round pieces on each side, and I rounded over the top with my router. Then it was epoxied to the bottom.
After it cured enough, I put fiberglass over the entire piece and also put 3" fiberglass tape on each side, fore and aft.
4 hours

Quarter Rounds Epoxied To The Bottom


Yesterday, I epoxied and nailed the quarter rounds for the sides down to the bottom of the boat. They didn't want to go down straight, but they are pretty close and can be sanded to match the sides exactly.
1.5 hours

Monday, December 6, 2010

Quarter Rounds For The Sides; Transom Trimmed


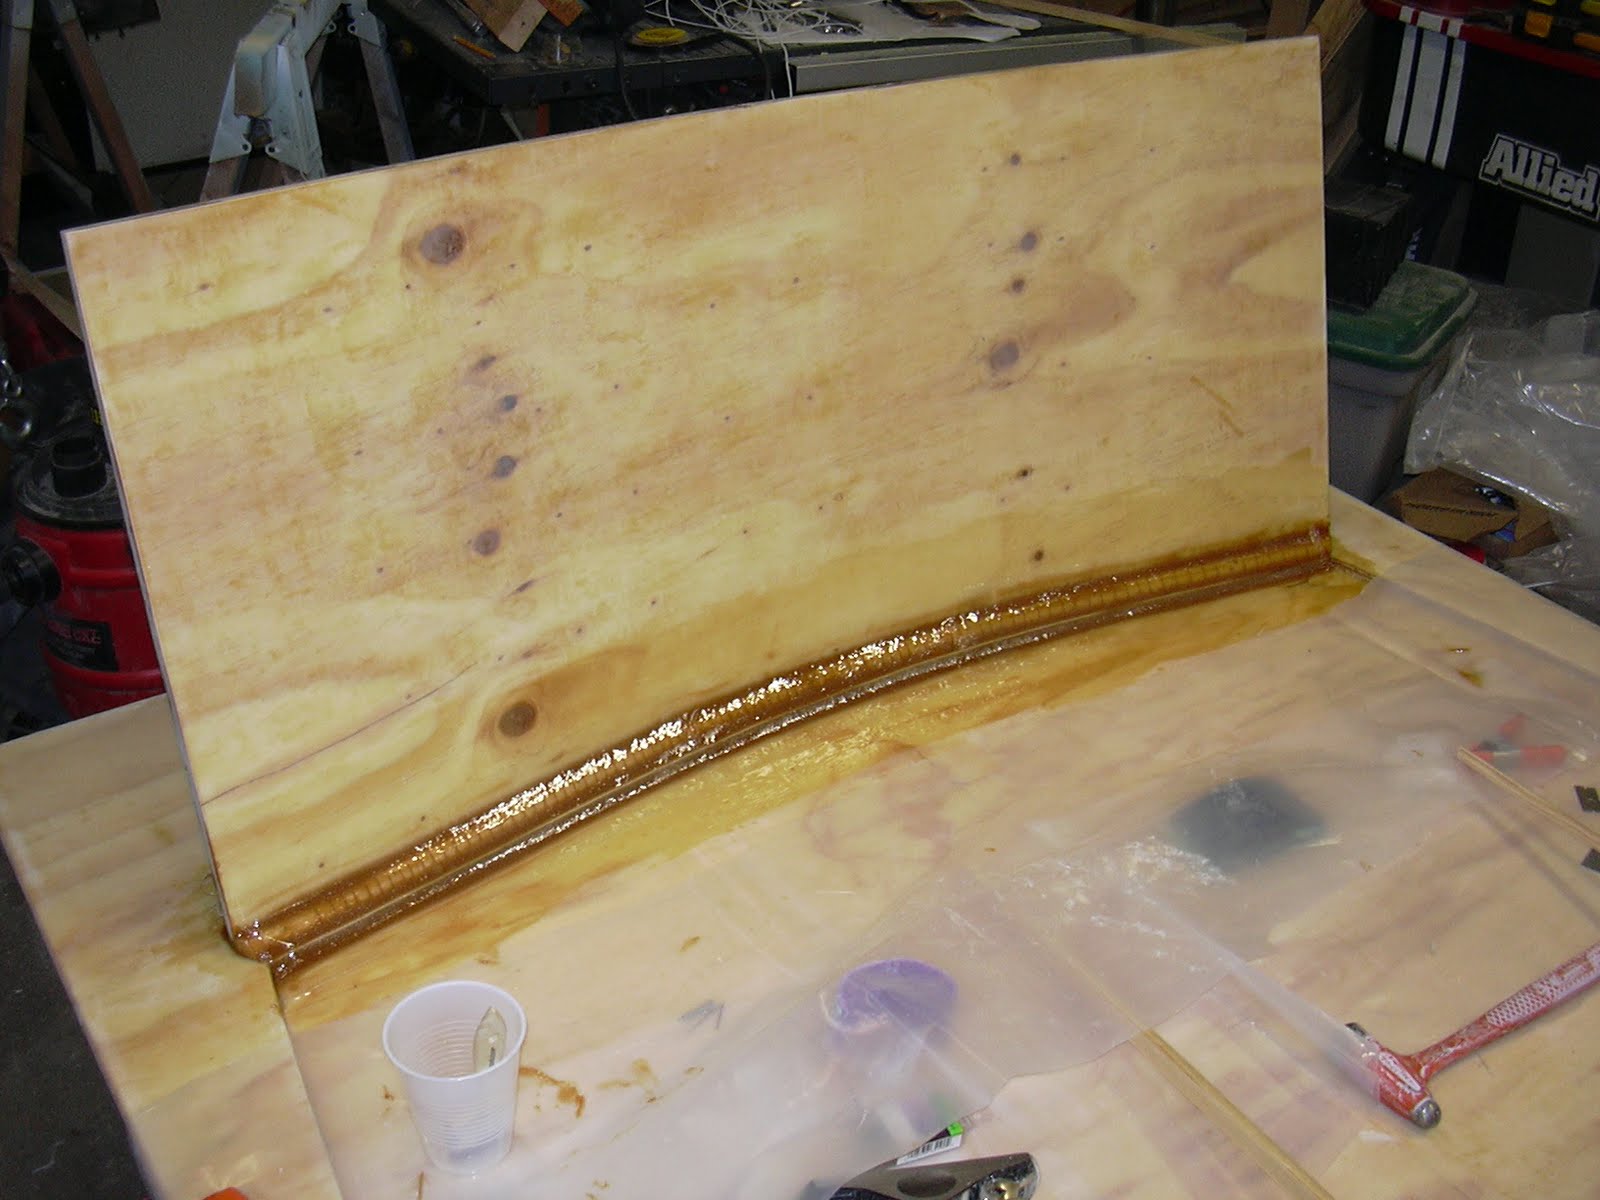
Yesterday, I made the quarter round pieces (4 in all) that will attach to the bottom and the sides. They were cut to length, cut with a band saw every 1 inch or so to allow them to bend easier, drilled with a #54 drill bit approximately every four inches, and the appropriate length nail was put in each hole. Next they will be epoxied down to the bottom.
I also trimmed the transom sides to match up with the sides of the boat when they are installed, and sanded and smoothed down the transom to bottom joints fore and aft.
5 hours

Saturday, December 4, 2010

Made a Small Parts Paint Booth Today!


Today I decided to make a small parts paint booth that will have a squirrel cage fan and vent to the outside of my garage through a dryer type vent.
It took me three hours to get to the stage in the photos. I still have to buy a blower (squirrel cage fan) and make some type of fiberglass vent system that will hook to the back of the paint booth, go through the fan and into the dryer vent.

Wednesday, December 1, 2010

Taped The Transom


Today, I nailed down the quarter round strip on the forward side of the transom to the planing doubler after applying non-filled epoxy and then a epoxy/wood flour mix. I then filleted the part to mess nicely with the transom and bottom of the boat. I also used the epoxy/wood flour mix to fillet the aft side. Then I fiberglassed taped the transom with 4" tape on the forward and aft sides and filled with epoxy. I have also waited about two hours and applied another layer of epoxy to fill the weave. One or two more layers of epoxy should take care of that.
4.5 hours