Thursday, March 31, 2011

Photos of the Newly Taped Areas


Here are some of the photos I didn't have for the last post.

Tuesday, March 29, 2011

Taped All Sides to Everything Left

Today, I fiberglassed all the remaining areas that the sides attached to, including the transom, bottom of the hull, rear seat verticals, top of front deck and front seat boxes. They were first filleted everywhere and then either 3" or 4 " fiberglass tape was used, depending on the area.
3.5 hours

Monday, March 28, 2011

Front Deck Installed / Bottom Taped To Sides


Today, I taped the front bottom to sides with either 4" fiberglass tape or two overlapped 3" pieces of fiberglass tape.
I also installed the front deck and cleaned up all the extra epoxy.
4.5 hours

Tuesday, March 22, 2011

Front Deck Top Fiberglassed

Today, I fiberglassed the top side of the front deck, as well as putting on the second layer of epoxy.
1 hour

Monday, March 21, 2011

Bottom of Front Deck Fiberglassed


Fiberglassed the bottom of the front deck. Will add another layer of epoxy in a couple of hours.
1.5 hours

Front Deck Made and Set


Yesterday, I used the template to make the front deck and fit it into place with #8 screws.
2 hours

Friday, March 18, 2011

Front Deck Template Made


Today, I made the template for the front deck out of cheap luan plywood. I also laid out the lines for the pilot house.
2 hours

Wednesday, March 16, 2011

Hull Sides Glued and Screwed


Yesterday, I spent time trimming the hull sides to the proper lines. I also got two more 1/4" pieces of plywood and drew out and cut out the second layer pieces that will go on soon.
Today, I epoxied the hull sides in to place and screwed them down with approximately 45 screws per side.
9 hours

Monday, March 14, 2011

Finished Screwing the Hull Sides On

Today, I spent a couple of hours screwing the hull sides on completely. Now I will take them off and trim all of the appropriate areas.
2 hours

Sunday, March 13, 2011

Aye Mates, She's A Boat!


Well not quite, but today I began fitting the hull side to the bottom. She is beginning to look like a boat now anyway! I am using #8 x 1" stainless steel screws to test fit it.
2 hours

Saturday, March 12, 2011

Hull Sides Ready For Installation


Today, I trimmed off the excess fiberglass all along the sides and sanded down all of the fiberglassed surfaces. The sides are now ready to be fit onto the boat!
2 hours

Friday, March 11, 2011

Hull Sides Cut Out to Shape and Fiberglassed


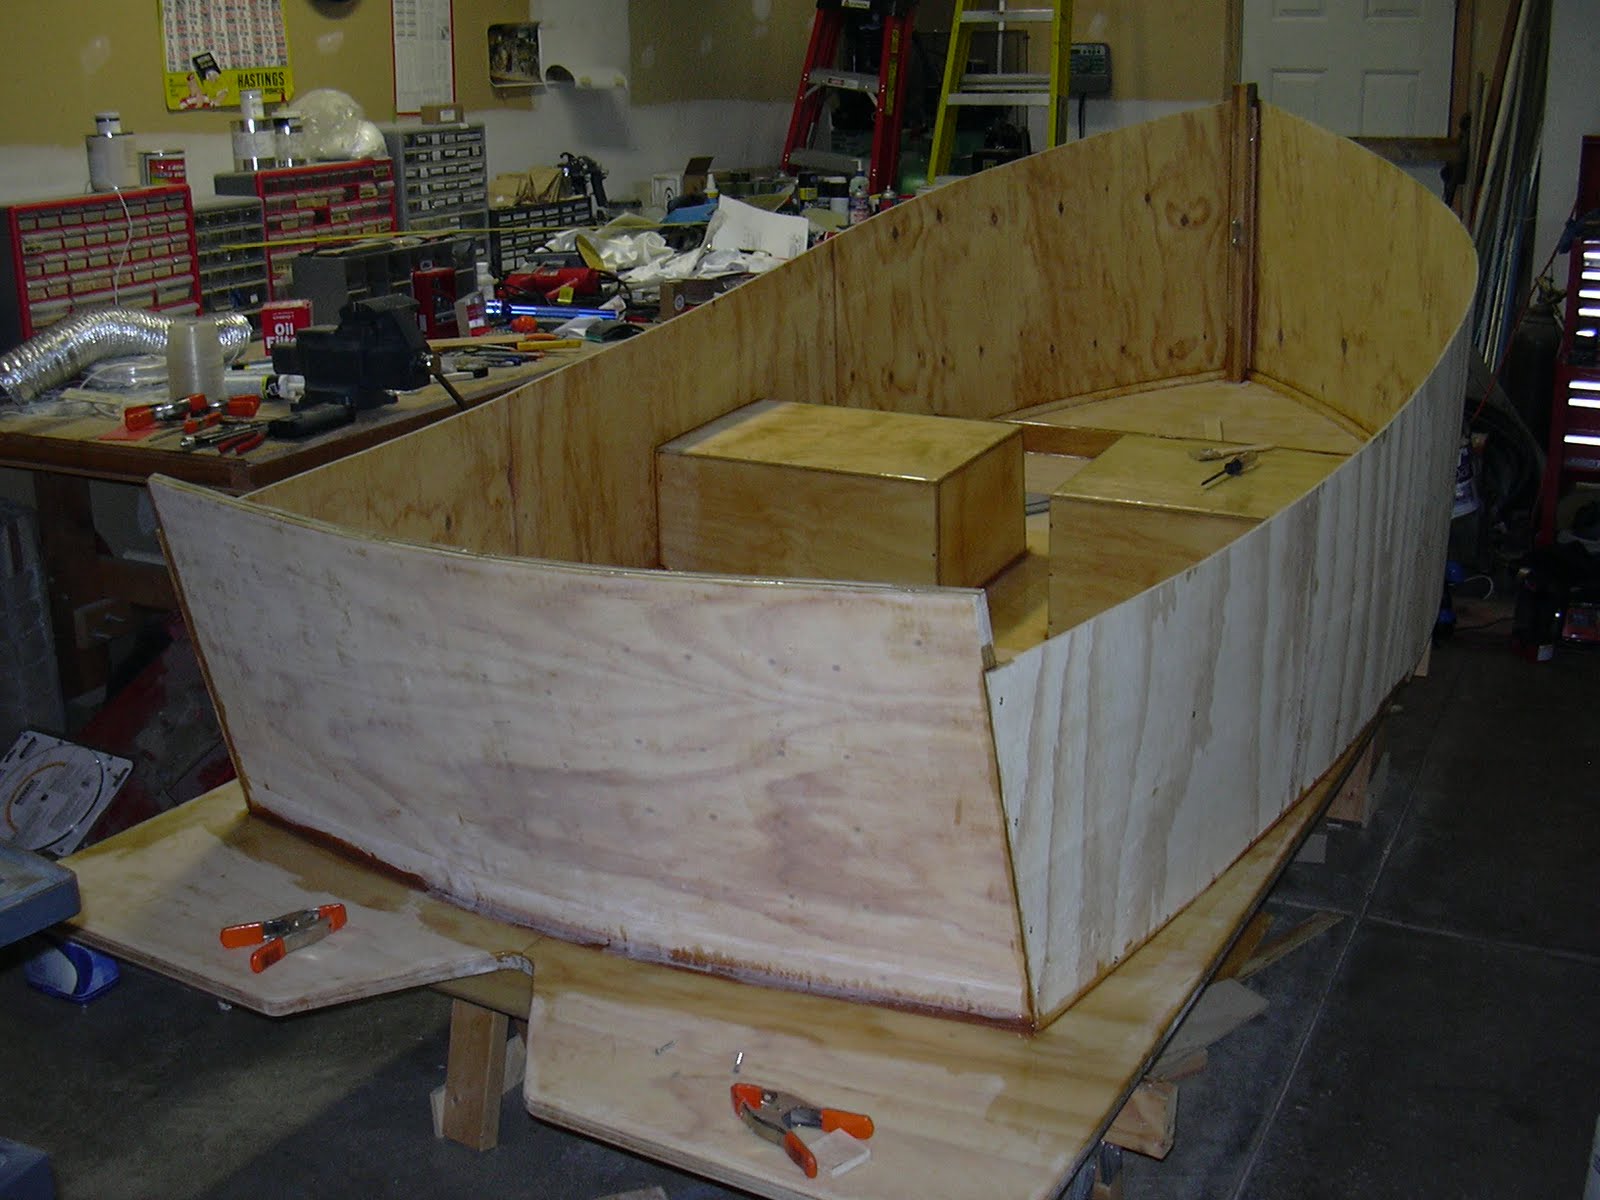
Today, I finally cut out the hull sides after laying out the lines on the plywood. I cut about 1-2" more on the front bottom so I can match it to the exact shape of the existing bottom of the boat.
I then fiberglassed, with fast hardener, the interior side of the hull sides and also put on a second layer of fast curing epoxy. If you look closely at the photo where the epoxy has already been applied, you can see what appear to be dry areas. That photo is before I added the second layer of epoxy, so they are covered pretty well now.
I have pretty much decided to cold mold a second 1/4" layer of plywood on the sides after these sides have been installed. After doing a couple of break test on the 1/4" plywood, I found it broke way to easily, from what I expected anyway. If I add a second layer, it will only add about 30 lbs. to the boat, but the sides will be so much stronger.
6 hours

Monday, March 7, 2011

Hull Side Scarfs Sanded and Faired


Today, I sanded down the scarfed areas and filled knot holes and then applied another layer of epoxy and wood flour to fair the scarfed areas. I used the fast cure hardener, so I hope to be able to sand this tonight and draw out the sides, then fiberglass the interior side.
1 hour

Saturday, March 5, 2011

Hull Side Scarfs Epoxied Together


Today, I epoxied all of the hull side scarfs together as well as filled all of the small, and not so small, knot holes in the interior side of the hull sides. I put weights on all of the epoxied scarfs, as well as screwed them down to a 2"x6" pieces of wood. It should be enough to keep them tight.
I will wait until the epoxy cures, then fair everything, and add another layer of epoxy and wood filler along the seams to fair them and then fiberglass the interior side of them before attaching them to the boat.
2 hours

Thursday, March 3, 2011

First Try at Making a Fender


Tonight, I made a small fender with 3/8" manila rope. It took about two hours from start to finish. I really want to make some bigger ones with 3/4" manila rope, but I wanted to see what it would take to make them first so I started small. It ended up about 2 1/4" in diameter and 12" long including the bight.
2 hours

Tuesday, March 1, 2011

Transom Doubler #2 Installed; Hull Sides Cut Out and Scarfs Cut


Today, the second transom doubler (or tripler) was sanded to match the shape of the installed doubler and then epoxied to the 1st doubler to make the transom 1 3/4" thick on the area that the outboard motor will attach to.
I also laid out the hull sides, cut them out, and cut the scarfs on each piece. A 2" scarf was used since it is 1/4" plywood. I am not too happy with the way there was some ripout along the edges, but I will use some thickened epoxy to fill those areas as well as some of the interior side knot holes. I hope to epoxy them up tomorrow.
4 hours